Using Your iPhone as a Sound Isolation Testing Device
Can you measure soundproofing with an iPhone? Yes — with caveats. Here's how it works, what affects accuracy, and how to get the most reliable results.
From the team behind the QuietScore iOS app
Professional sound transmission testing uses $5,000+ worth of calibrated equipment. But the microphone in your iPhone is surprisingly capable — and with the right approach, you can get useful, repeatable sound isolation measurements with just your phone and a Bluetooth or AirPlay speaker.
This guide covers exactly how it works, what affects accuracy, and how to get the best results.
How iPhone-Based Sound Testing Works
The basic principle is simple: measure how much quieter sound is on one side of a barrier compared to the other.
The process:
- Place a Bluetooth or AirPlay speaker on the source side (the room you want to block sound from)
- Stand with your iPhone on the receiving side (where you want quiet)
- The app plays test tones through the speaker at known frequencies
- Your iPhone’s microphone measures the sound level that makes it through the barrier
- The difference between what was played and what was received is the transmission loss — your isolation score
Apps like QuietScore automate this process. The app plays a frequency sweep through your Bluetooth or AirPlay speaker, measures the received levels, and calculates a Sound Isolation Score across multiple frequency bands.
The Pros: Why This Actually Works
It’s accessible
You already own the most expensive piece of equipment — your iPhone. Add a $30–$80 Bluetooth or AirPlay speaker and you have a testing setup. Professional testing starts at $500 per site visit.
It gives you real numbers
Unlike a subjective listening test, you get actual decibel measurements and a score you can compare:
- Before vs. after a soundproofing improvement
- Door vs. wall vs. window in the same room
- Different rooms in your home
It tests across frequencies
Good apps don’t just give you a single number — they show you how your barrier performs at different frequencies. This is critical because:
- A wall might block speech frequencies (500–1000 Hz) well but fail at bass (125 Hz)
- A door might have decent mass but leak high frequencies through air gaps
- Knowing which frequencies leak tells you what fix you need
It’s repeatable
Run the same test twice under the same conditions and you’ll get similar results. This makes before/after comparisons meaningful.
The Cons: Honest Limitations
iPhone microphone frequency response
The iPhone’s built-in microphone is designed for voice calls and video recording — not laboratory acoustic measurement. Here’s what that means in practice:
Below 200 Hz: The iPhone microphone’s sensitivity drops off significantly. Low bass measurements will be less accurate. If your main problem is a neighbor’s subwoofer, the iPhone will detect the issue but may understate how bad it is.
200 Hz – 8000 Hz: This is the iPhone’s sweet spot. Measurements in the speech frequency range (250–4000 Hz) are reasonably accurate and consistent.
Above 8000 Hz: Accuracy varies by iPhone model and microphone position. Less relevant for soundproofing since most barriers block high frequencies easily.
The practical impact: For most soundproofing questions — “Is my door the weak link?”, “Did adding weatherstripping help?”, “Which room has better isolation?” — the iPhone microphone is plenty accurate. It’s less suitable for precise low-frequency measurements where you need exact dB values.
Ambient noise affects results
Professional tests are done with controlled background noise. Your home has HVAC, traffic, appliances, and other noise that raises the baseline measurement. This can make your barrier appear to perform worse than it actually is.
Mitigation: Test during the quietest time you can. Turn off HVAC if possible. Close windows. The app measures ambient noise before the test starts — if it’s too loud, it’ll warn you.
It’s not a certified STC rating
An iPhone measurement gives you a Sound Isolation Score — a practical number that indicates how well your barrier blocks sound. It’s comparable to professional STC ratings but not identical, because:
| Professional STC Test | iPhone App Test | |
|---|---|---|
| Frequency bands | 16 bands (125–4000 Hz) | 4 bands (125–4000 Hz) |
| Microphone | Calibrated Class 1 measurement mic | iPhone MEMS microphone |
| Speaker | Reference-grade loudspeaker | Consumer Bluetooth or AirPlay speaker |
| Environment | Controlled conditions per ASTM E336 | Real-world home environment |
| Result | Certified STC number | Sound Isolation Score |
| Cost | $500–$2,000 | Free – $10/month |
| Accuracy | ±1–2 STC points | ±3–5 points vs. lab STC |
The bottom line: iPhone testing is a practical measurement tool. It’s accurate enough for decision-making (which barrier is weakest? did the fix work?) but not accurate enough for building code certification or legal documentation. For those, you need a professional.
How to Get the Most Accurate Results
Speaker placement matters — a lot
The position of the Bluetooth or AirPlay speaker directly affects your measurement. Get this wrong and your results will be unreliable.
Do:
- Place the speaker 1–2 meters (3–6 ft) from the barrier on the source side, facing the barrier
- Position it at roughly ear height (1–1.5 meters / 3–5 ft from the floor)
- Keep it away from corners — corners amplify bass frequencies artificially (room modes), which inflates low-frequency readings
- Use the same speaker position for before/after comparisons
Don’t:
- Place the speaker directly against the wall — this couples vibration directly into the structure, bypassing the air path and giving misleadingly bad results
- Put the speaker on the floor — floor reflections create interference patterns
- Use different speakers for before/after tests — each speaker has a different frequency response
Phone placement is equally critical
Where you hold your iPhone during measurement changes what it picks up.
Do:
- Hold the phone at ear height, about 1–1.5 meters (3–5 ft) from the barrier
- Keep the microphone (bottom of the phone) pointed toward the barrier
- Stay still during the measurement — movement creates noise and inconsistency. Apps like QuietScore use your iPhone’s motion sensors to detect movement and warn you if you shift position
- Stand in the middle of the room, away from walls and corners
Don’t:
- Hold the phone against the wall — you’ll measure structural vibration, not airborne sound
- Cover the microphone with your hand
- Stand right in a corner — room modes will artificially amplify certain frequencies
- Move around during the test
Environmental conditions
Quiet is essential. Background noise raises your measurement floor. The difference between testing at 2 AM (ambient 25 dB) versus noon with HVAC running (ambient 40 dB) can be 5–10 points on your score.
Before testing:
- Turn off HVAC if possible (or at minimum, close vents in both rooms)
- Close all doors and windows not being tested
- Turn off TVs, computers, appliances
- Ask others in the house to stay quiet during the 30-second measurement
Consistency between tests:
- Use the same speaker at the same volume
- Same speaker and phone positions
- Same time of day (similar ambient conditions)
- Test the same barrier multiple times and average the results
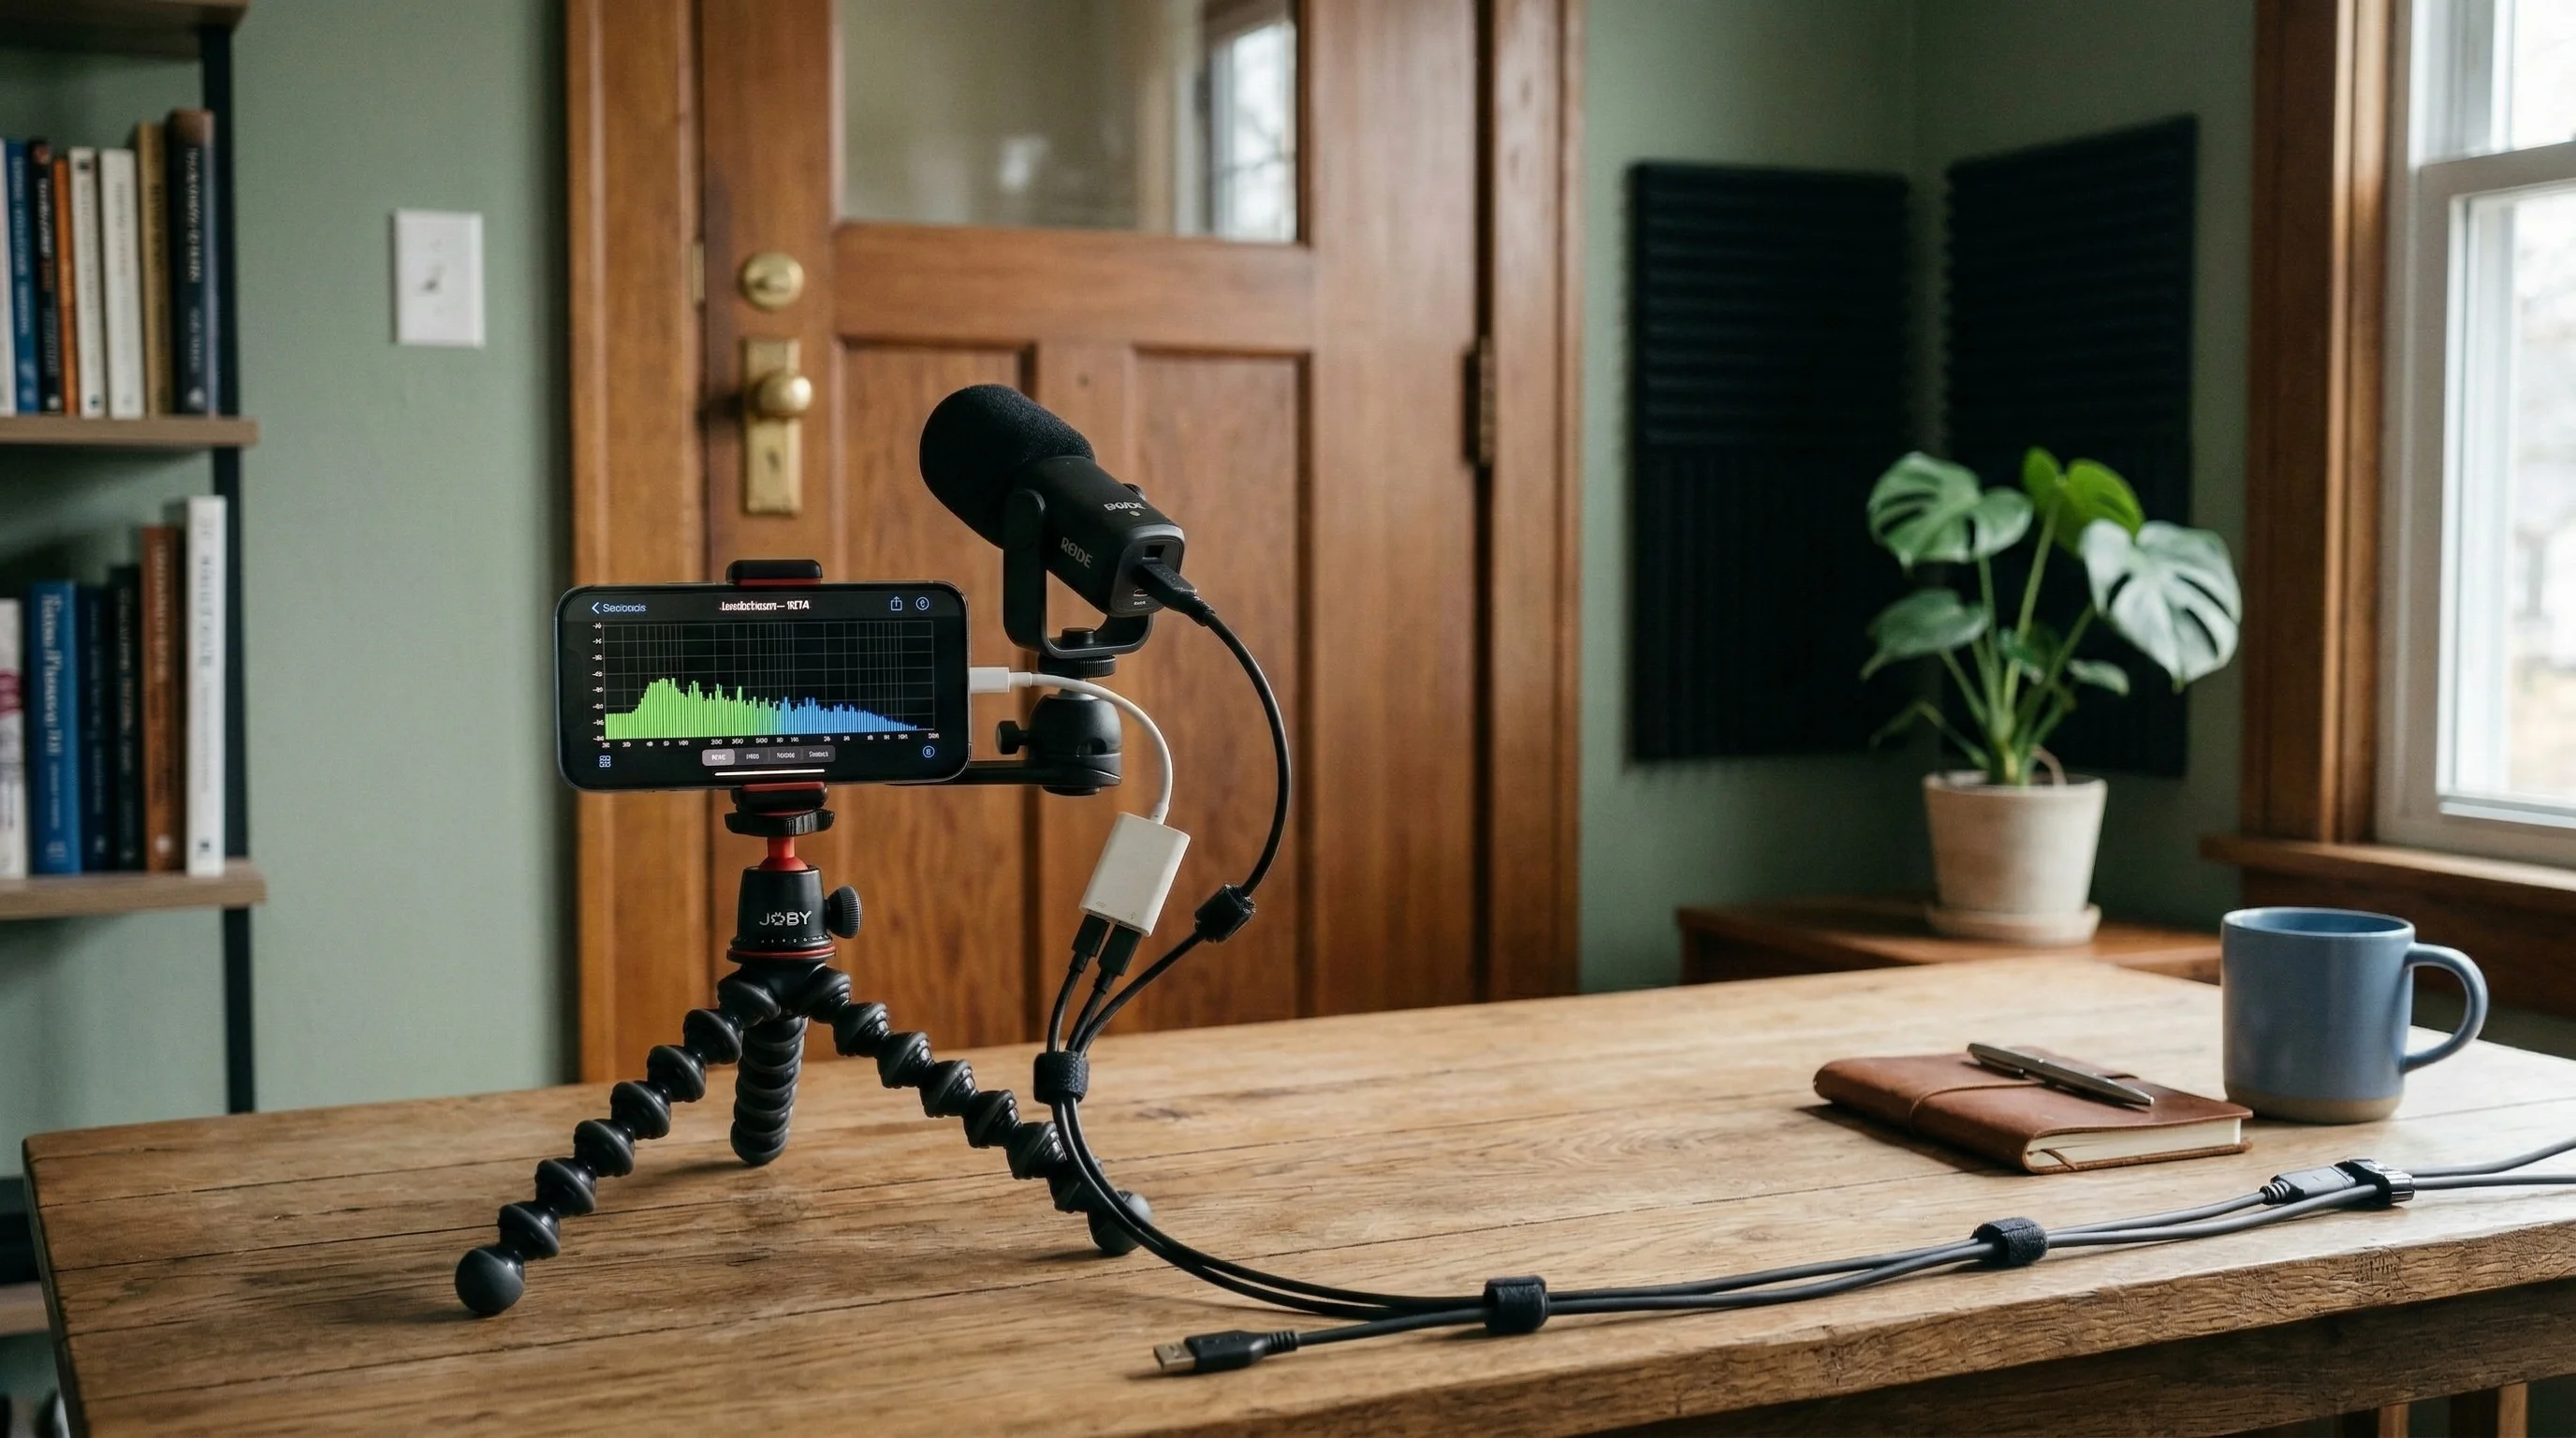
Improving Accuracy: USB Measurement Microphones
For significantly better accuracy, especially at low frequencies, you can connect a USB measurement microphone to your iPhone.
What is a measurement microphone?
A measurement microphone is designed to have a flat, known frequency response — meaning it picks up all frequencies equally, without the peaks and dips of a consumer microphone. Professional acoustic testing always uses measurement mics.
How to connect one to your iPhone
You need:
- USB measurement microphone — MiniDSP UMIK-1 ($80) or Dayton Audio UMM-6 ($50) are popular choices
- Lightning-to-USB adapter (Apple Camera Connection Kit) or USB-C adapter depending on your iPhone model
- Calibration file — Each measurement mic comes with a unique calibration file from the manufacturer. Apps like QuietScore can import this file and apply the frequency correction automatically.
What improvement does it make?
| iPhone Built-in Mic | USB Measurement Mic | |
|---|---|---|
| Low frequency (125 Hz) | ±5–8 dB accuracy | ±1–2 dB accuracy |
| Mid frequency (500–1000 Hz) | ±2–3 dB accuracy | ±0.5–1 dB accuracy |
| High frequency (4000 Hz) | ±2–4 dB accuracy | ±1 dB accuracy |
| Overall score accuracy | ±3–5 vs lab STC | ±1–3 vs lab STC |
| Calibration | Generic (all iPhone models differ) | Individual unit calibration |
| Self-noise | Higher (phone electronics) | Very low |
The biggest win is below 200 Hz. If low-frequency noise (bass, traffic rumble, HVAC) is your main concern, a USB mic is worth the investment. For speech-frequency problems, the iPhone mic is adequate.
Is it worth it?
- Homeowner checking doors and walls: iPhone mic is fine. Spend the money on a door sweep instead.
- Homeowner with bass/low-frequency problems: Consider it. The UMIK-1 at $80 will give you much more reliable low-frequency data.
- Contractor quoting soundproofing jobs: Yes. Better data means better recommendations and more credibility with clients.
- Acoustic enthusiast or home theater builder: Definitely. You’ll want measurement-grade accuracy for tuning your room.
iPhone Testing vs. Professional STC Testing: When to Use Which
Use iPhone app testing when:
- You want to identify which barrier is weakest (door vs. wall vs. window)
- You’re measuring before/after a DIY soundproofing project
- You’re checking an apartment’s sound isolation before signing a lease
- You need a quick, approximate answer
- Budget is a factor
Use professional testing when:
- Building code requires a certified STC rating
- Legal dispute about noise between units
- Commercial project with specified acoustic requirements
- Insurance claim for noise-related issues
- You need a signed report from a qualified acoustician
Use both when:
- Planning a major renovation — use iPhone testing to identify problems cheaply, then get professional testing on the final result for documentation
- Screening multiple rooms — use iPhone testing to find the worst performers, then professionally test only those that need certification
Getting Started
The fastest way to test your soundproofing with your iPhone:
- Download QuietScore (free)
- Connect a Bluetooth or AirPlay speaker
- Place the speaker on the other side of the wall or door you want to test
- Follow the in-app instructions — the whole test takes under 5 minutes
- Get your Sound Isolation Score with a frequency breakdown
Once you have your baseline, you know exactly where to focus your soundproofing efforts.
Next Steps
- How to Test Soundproofing at Home — All testing methods compared
- Soundproofing 101 — Understand the fundamentals
- How to Improve Your Soundproofing — Solutions based on your test results
- Sound Frequency Guide — Understanding which frequencies are your problem
- Best USB Measurement Microphones — If you want to upgrade your accuracy